top of page

01
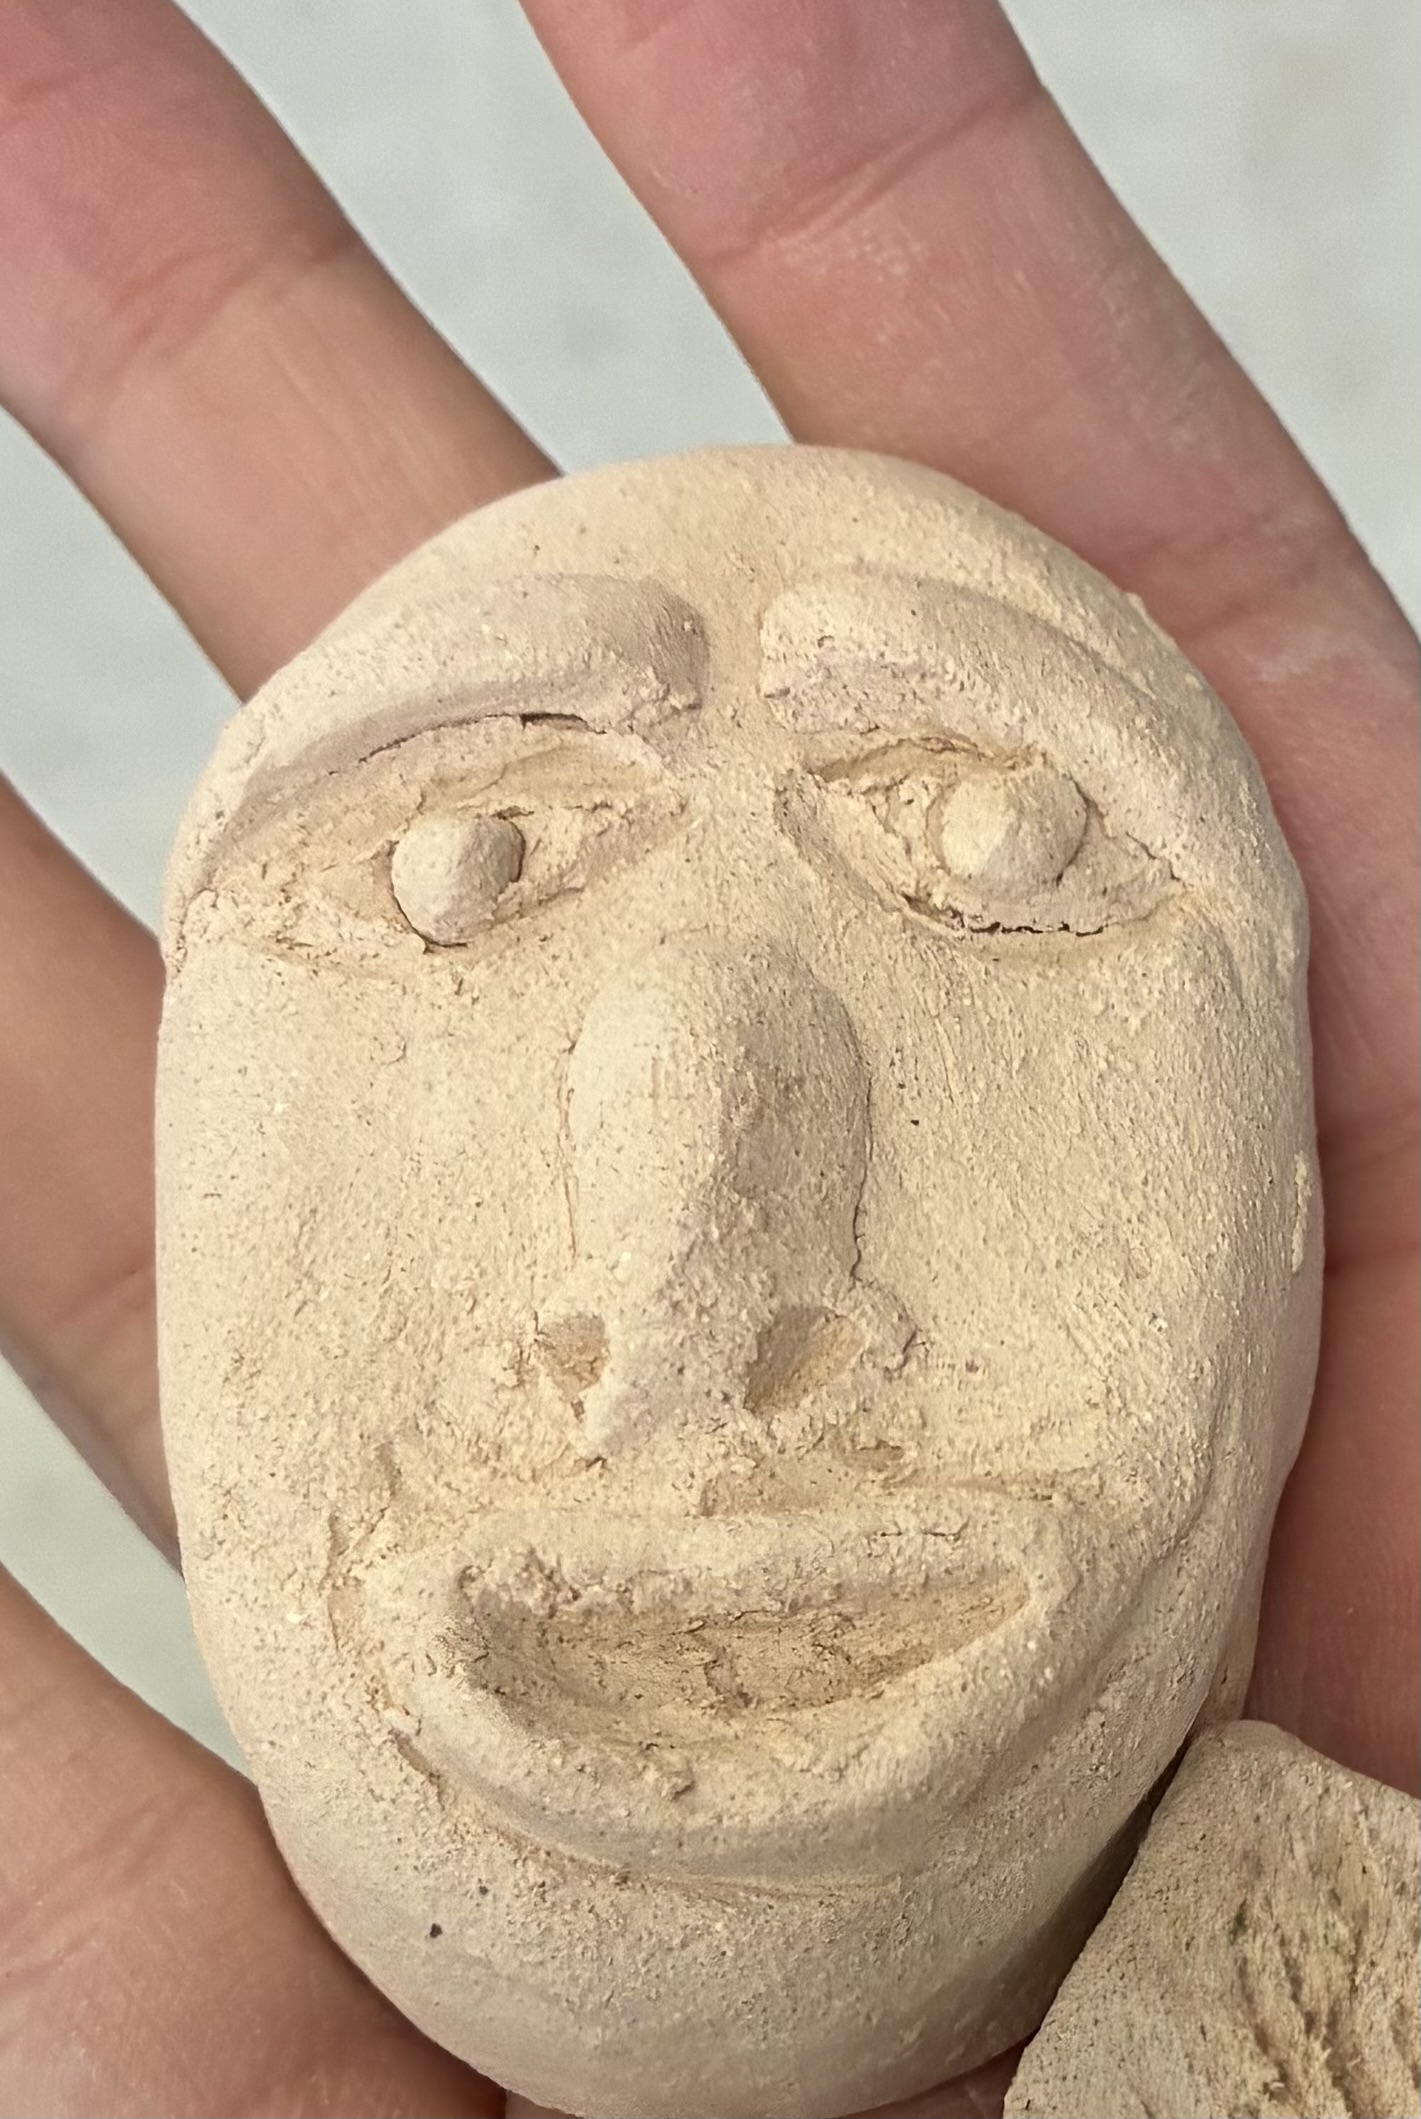
Face
Plan: Make a ball of clay and try to sculpt a random face into it
Process: Made a ball of clay, flattened it out a little bit, sculpted out the eye shape, added more clay for the eyebrows then I shaped them out, then I added tiny balls for the eyes and shaped them to fit, then I added more clay for the nose and shaped it onto the face, then I added more clay for the mouth and carved it out so it would be a better shape. Then I fired it.
Reflection: As you can see I didn´t glaze this piece because I didn´t really like it. What I think went well with this is the fact that you can clearly see the expression and emotion on the face. What I could have done better smoothing it out better and taking more time to add detail and carve things out better.
Process: Made a ball of clay, flattened it out a little bit, sculpted out the eye shape, added more clay for the eyebrows then I shaped them out, then I added tiny balls for the eyes and shaped them to fit, then I added more clay for the nose and shaped it onto the face, then I added more clay for the mouth and carved it out so it would be a better shape. Then I fired it.
Reflection: As you can see I didn´t glaze this piece because I didn´t really like it. What I think went well with this is the fact that you can clearly see the expression and emotion on the face. What I could have done better smoothing it out better and taking more time to add detail and carve things out better.

02
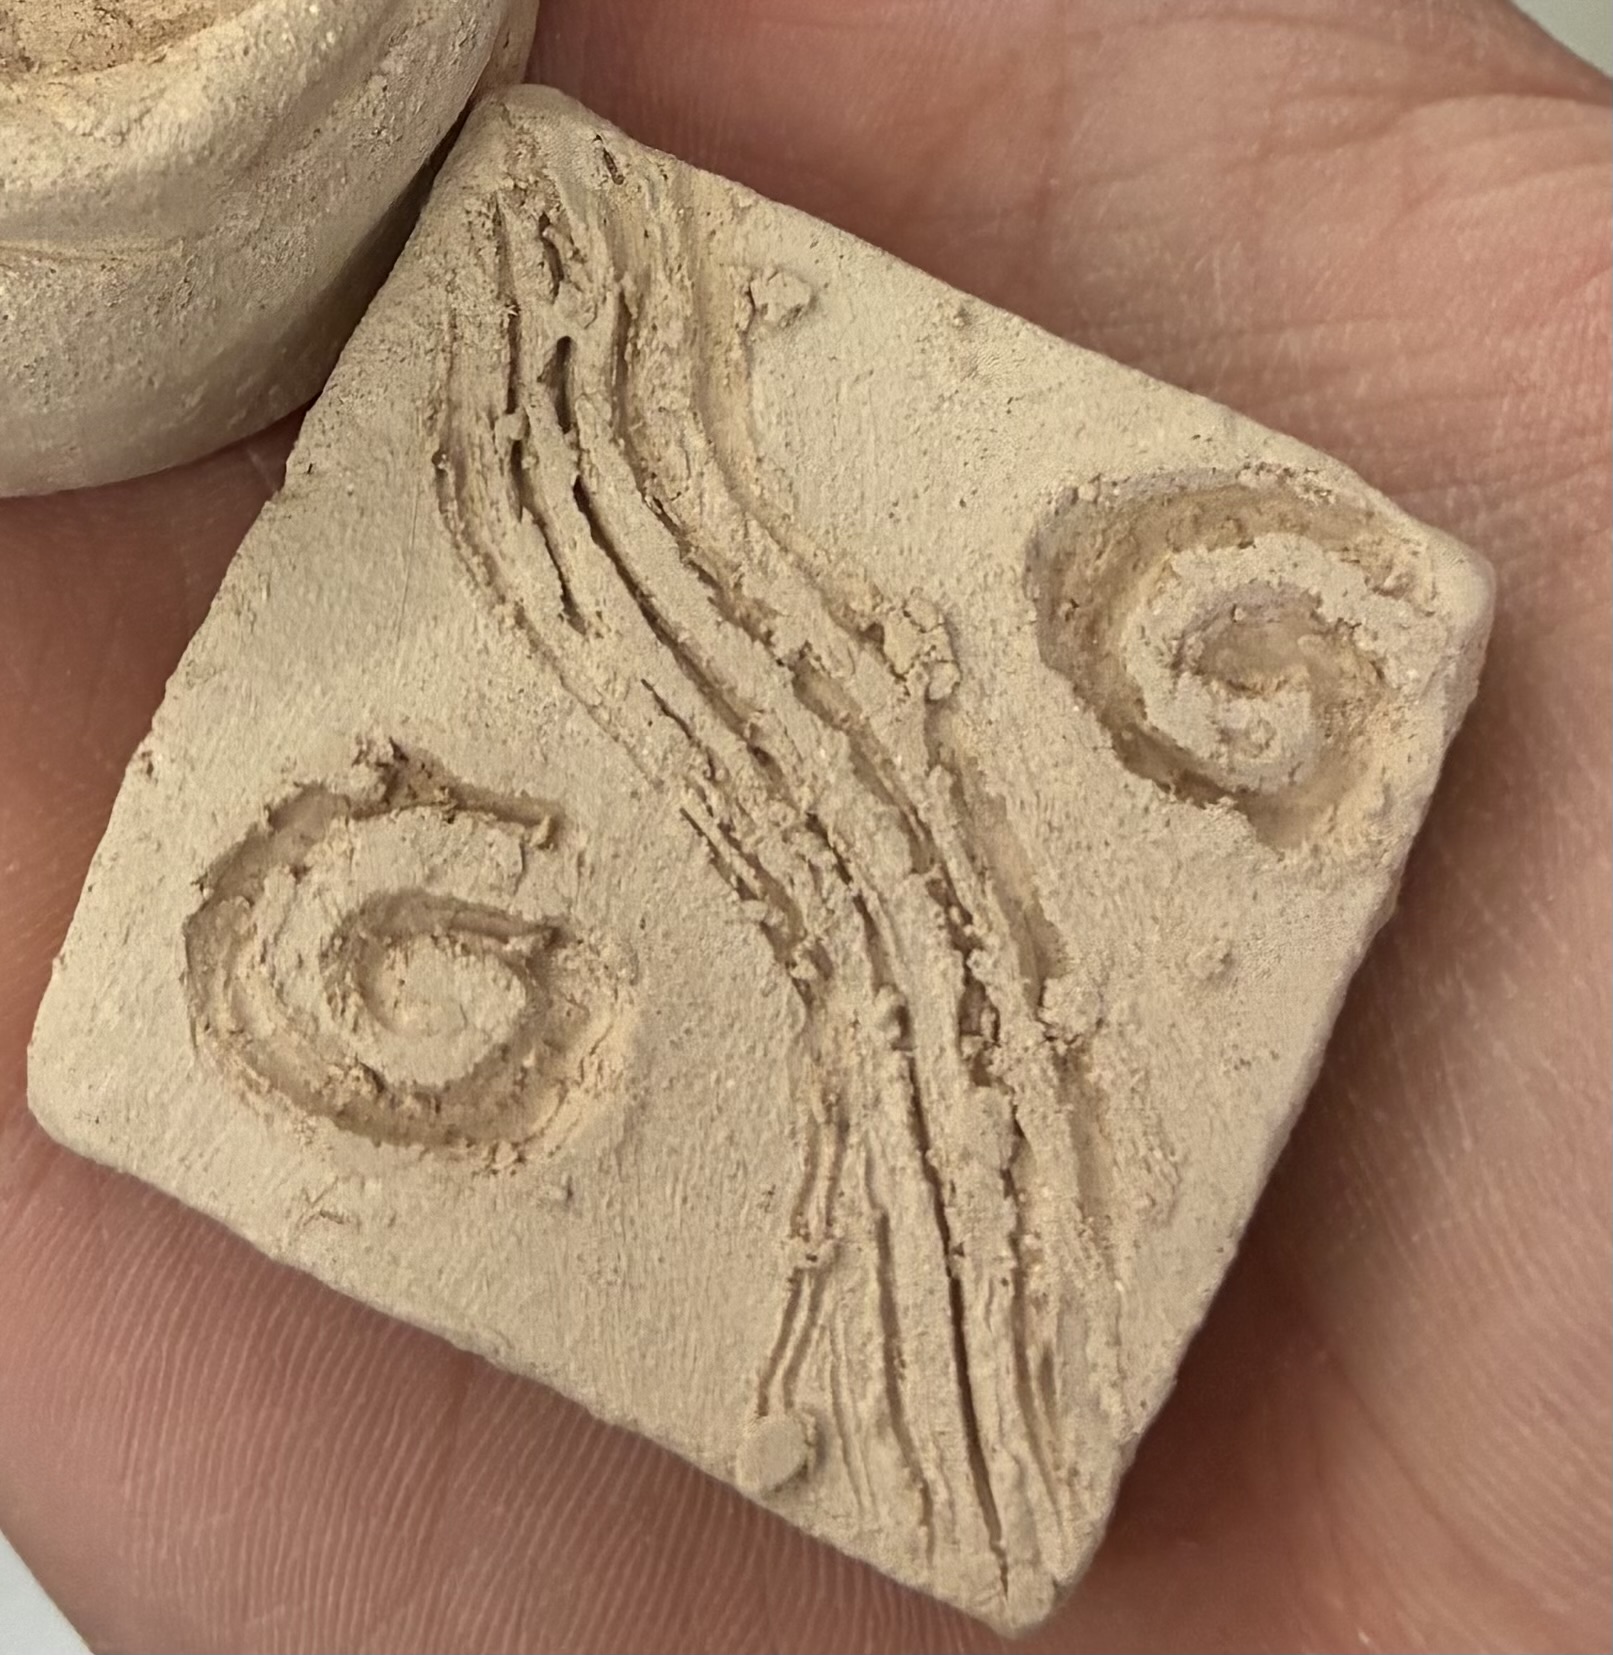
Stamp
Plan: Make a square shape and carve a random design
Process: I made a ball of clay then I rolled it out flat with a rolling pin. Then I cut it into a square shape, then I carved out random swirls and waves. Then I fired it.
Reflection: I didn´t fire this piece because it came out looking really rough. What I like about this piece is the design I did. What I could have done better is smoothing it out and carving out the design more seamlessly. I also forgot to do a handle on the back, so it´s less useful as a stamp.
Process: I made a ball of clay then I rolled it out flat with a rolling pin. Then I cut it into a square shape, then I carved out random swirls and waves. Then I fired it.
Reflection: I didn´t fire this piece because it came out looking really rough. What I like about this piece is the design I did. What I could have done better is smoothing it out and carving out the design more seamlessly. I also forgot to do a handle on the back, so it´s less useful as a stamp.

03
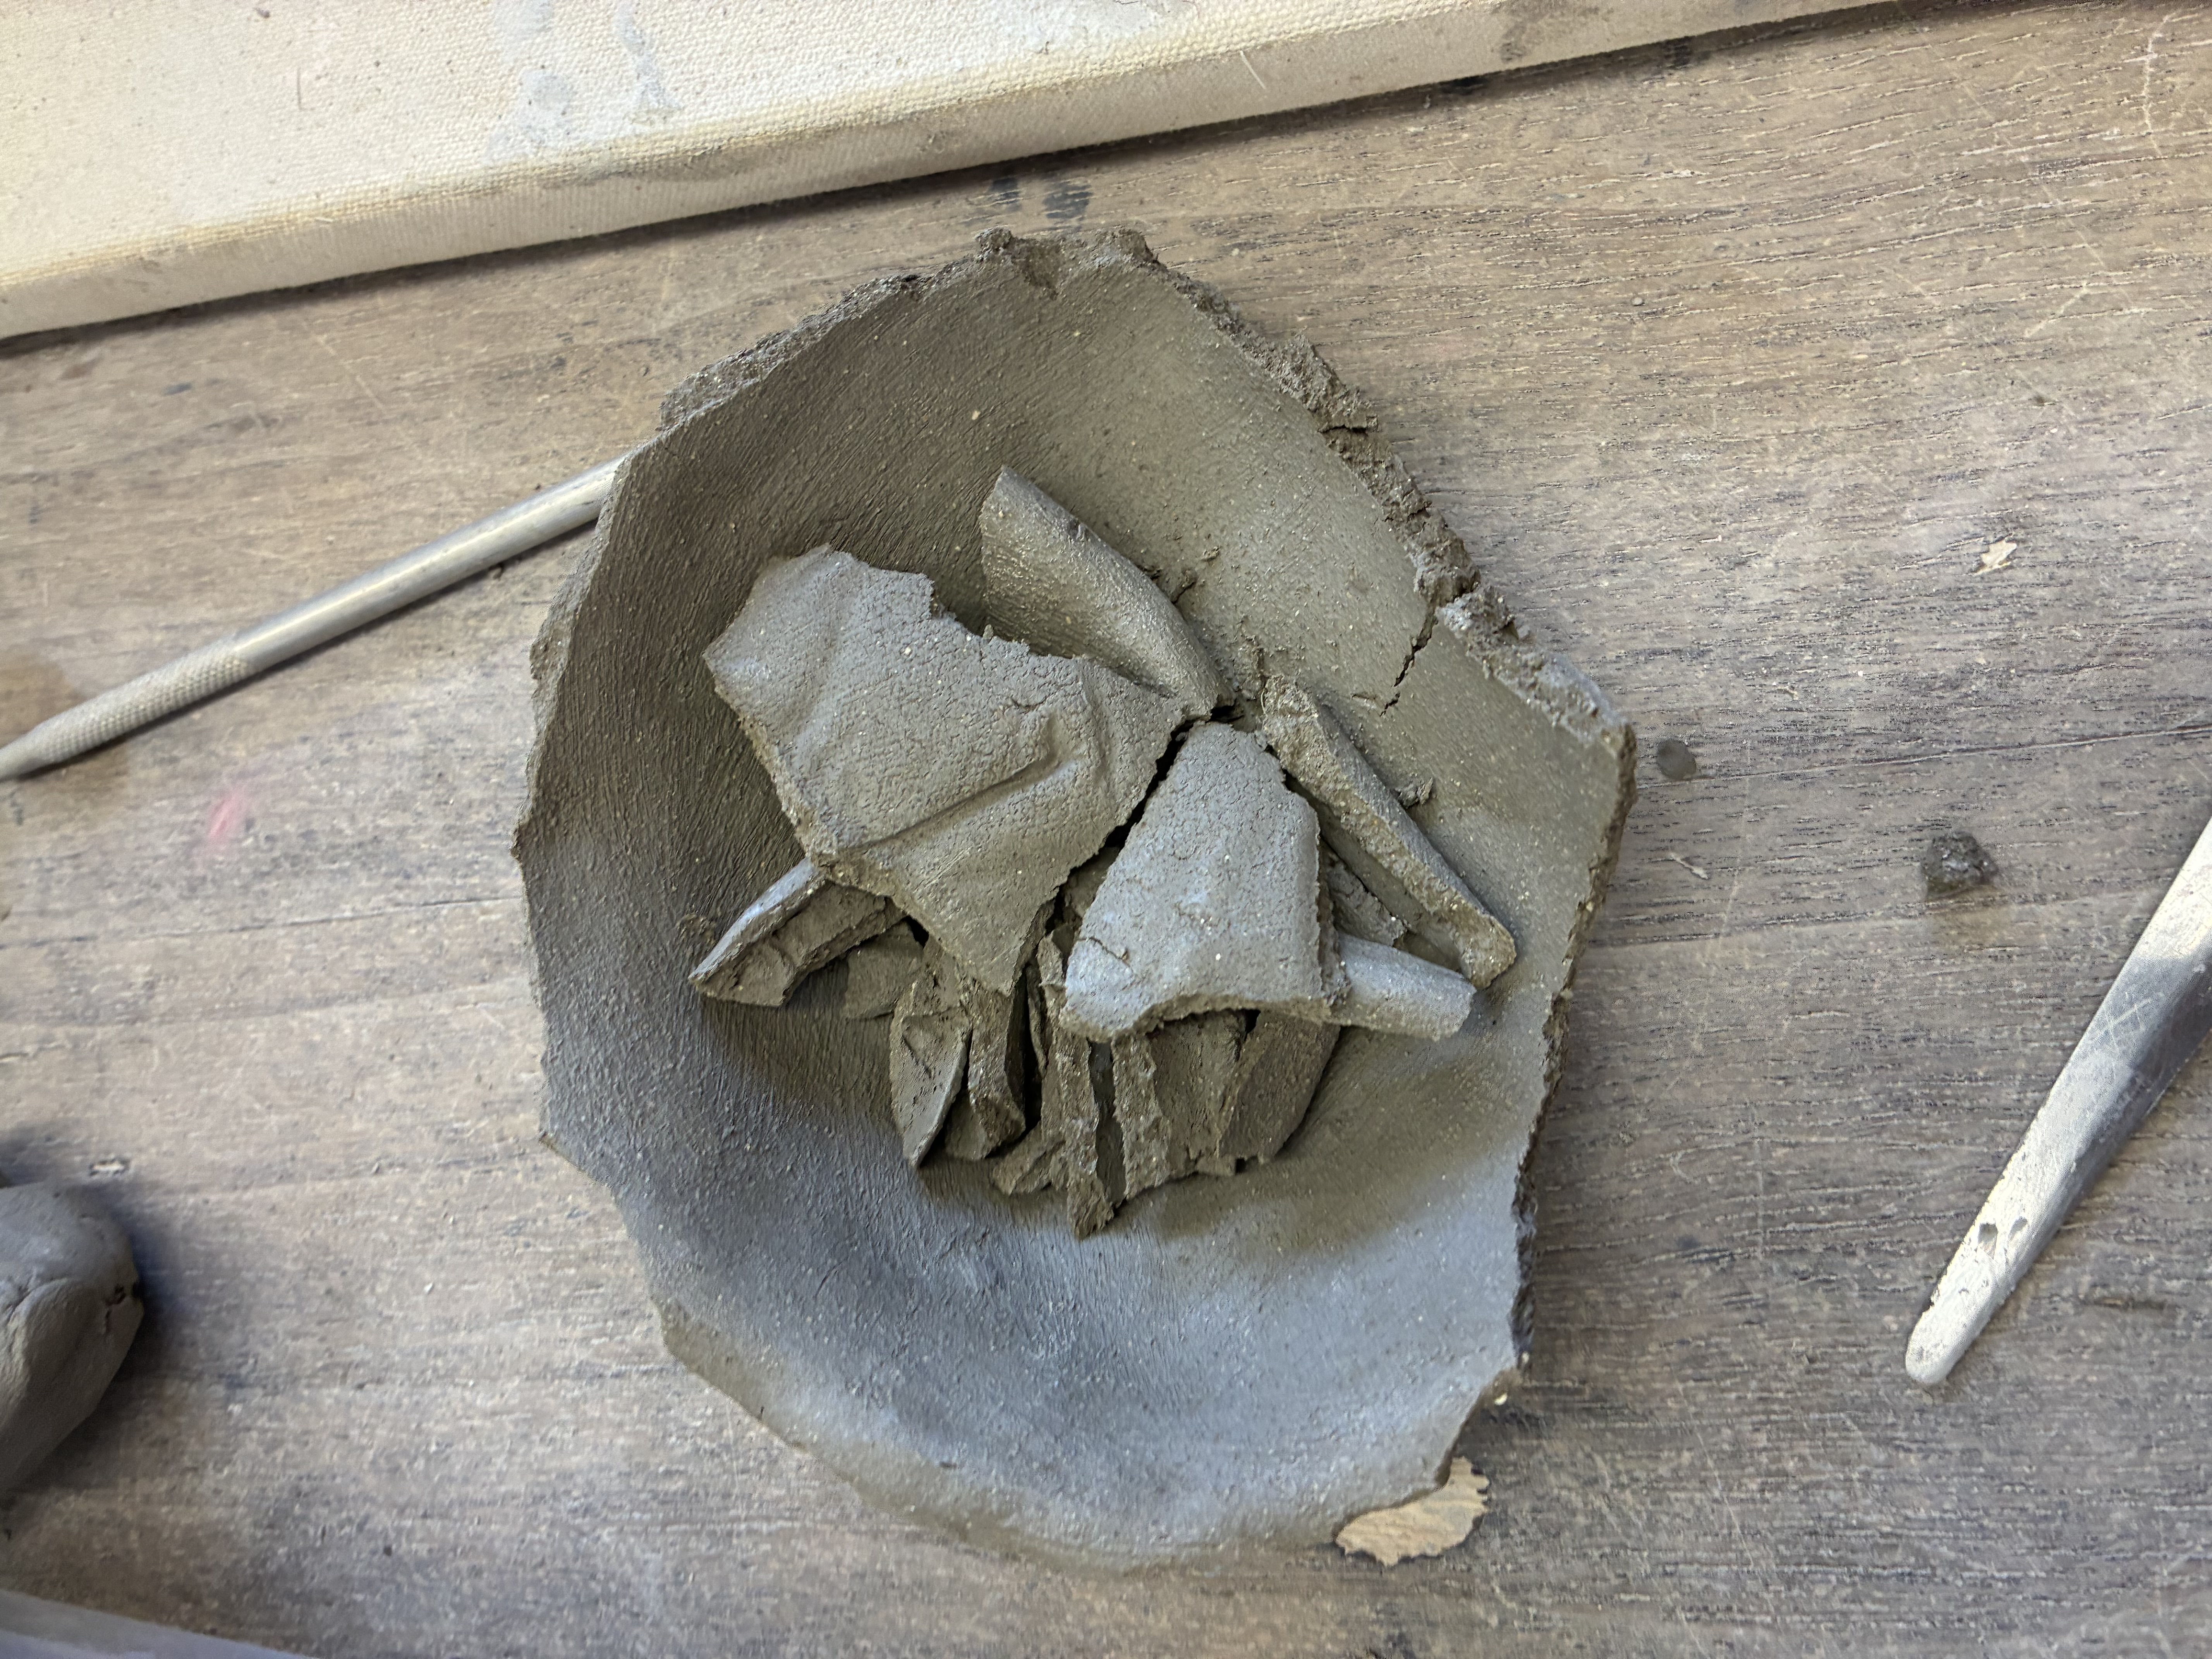
Failed choice bowl
Plan: Make a bowl using an actual bowl as a mold
Process: I grabbed a bowl and put plastic in it, then I put the clay in it and shaped the clay to fit the mold.
Reflection: This was a bowl that I tried to make and then it broke. I had used an actual bowl as a mold and put plastic inside so the clay wouldn´t stick to it. I let it dry in my container, and it had been 2 or 3 weeks and it still wasn´t fully dry yet. So I tried to let it dry in the sun for about 30 min during class while I worked on other things. Then I thought it was dry enough and I moved it around a little bit to look at it and a piece of it broke off. In the future if I did this again I would let it dry more, and I would also try using the hairdryer to speed up the drying process.
Process: I grabbed a bowl and put plastic in it, then I put the clay in it and shaped the clay to fit the mold.
Reflection: This was a bowl that I tried to make and then it broke. I had used an actual bowl as a mold and put plastic inside so the clay wouldn´t stick to it. I let it dry in my container, and it had been 2 or 3 weeks and it still wasn´t fully dry yet. So I tried to let it dry in the sun for about 30 min during class while I worked on other things. Then I thought it was dry enough and I moved it around a little bit to look at it and a piece of it broke off. In the future if I did this again I would let it dry more, and I would also try using the hairdryer to speed up the drying process.

04
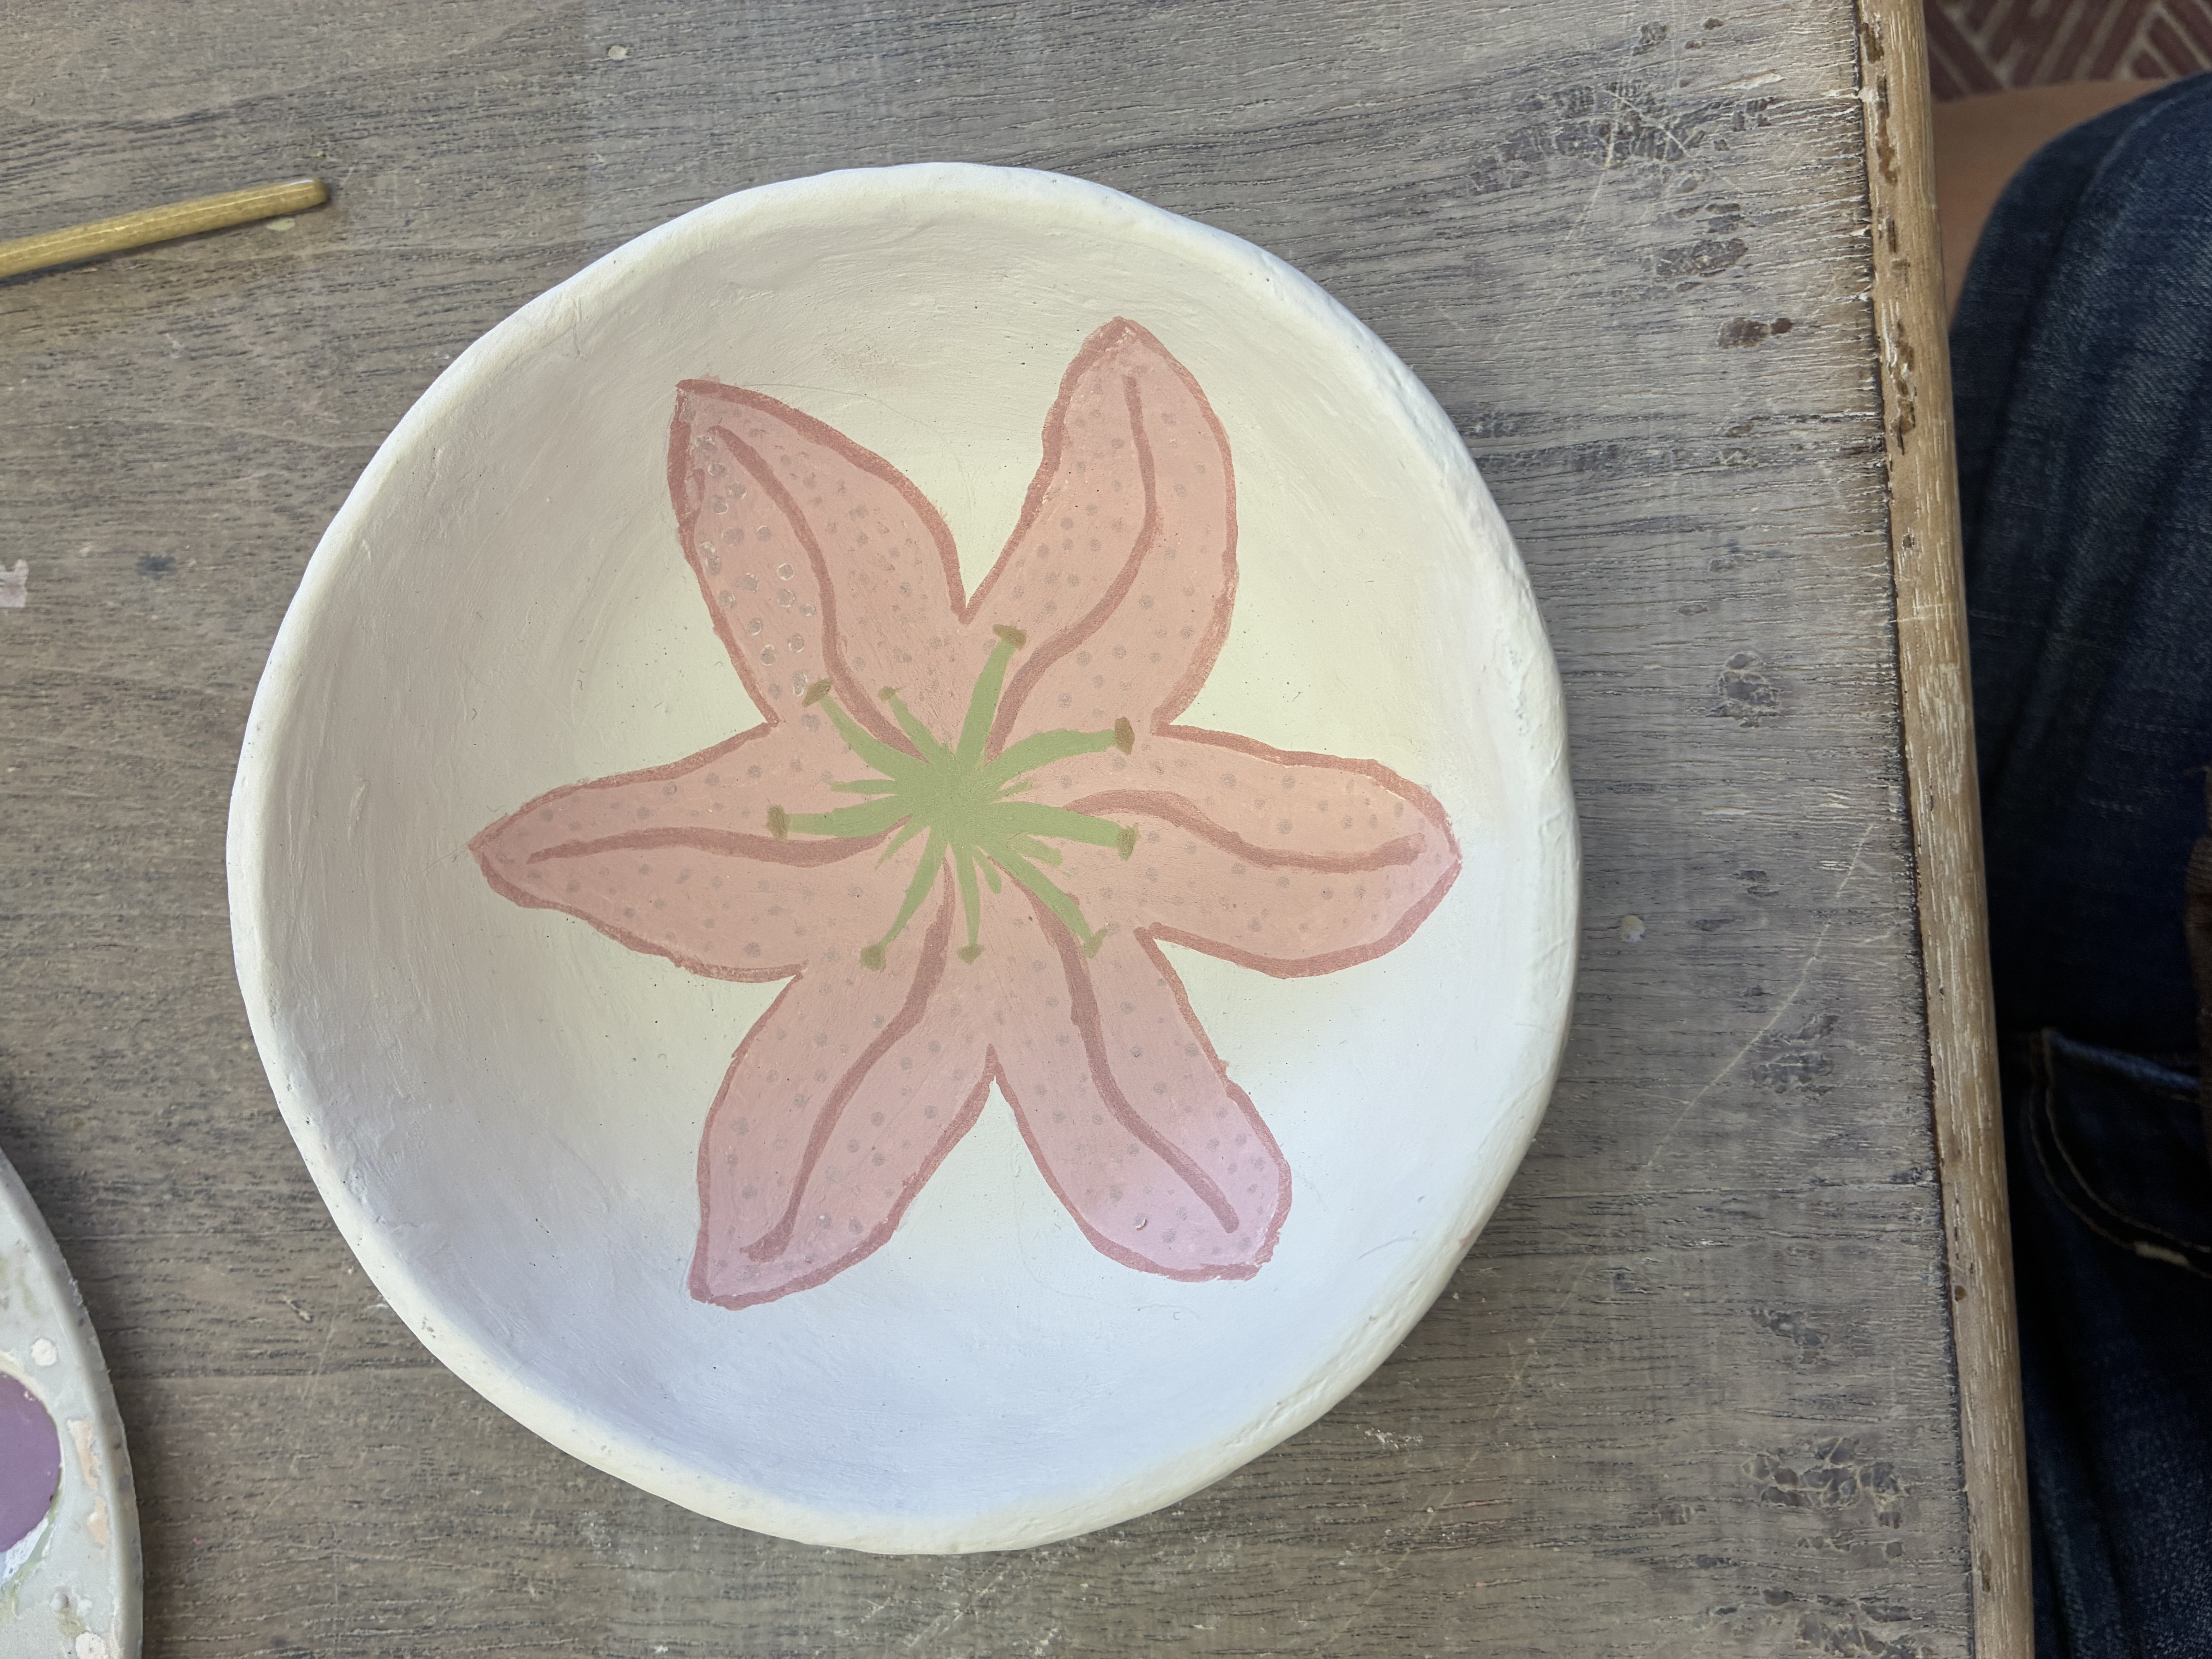
Under glaze piece
Plan: Make a bowl, paint a cute flower design
Process: I made this out of a pinch pot (because I did this one a little so I already learned how to make pinch pots), then I painted it with white under glaze, then I used a pencil to very lightly mark how to paint out the flower, then I painted the flower with pink under glaze, then I used a darker pink under glaze to outline it and do wavey details inside the flower, then I used a brownish pink to do little dots, then I painted the inner green part of the flower, then I fired it
Reflection: I really like this piece and I think it´s the best one I´ve done so far. What I think went well about this piece is I took my time and used a good refrence photo so it turned out looking really good. What could be improved is having sharper lines, adding more details, and just perfecting it more overall.
Process: I made this out of a pinch pot (because I did this one a little so I already learned how to make pinch pots), then I painted it with white under glaze, then I used a pencil to very lightly mark how to paint out the flower, then I painted the flower with pink under glaze, then I used a darker pink under glaze to outline it and do wavey details inside the flower, then I used a brownish pink to do little dots, then I painted the inner green part of the flower, then I fired it
Reflection: I really like this piece and I think it´s the best one I´ve done so far. What I think went well about this piece is I took my time and used a good refrence photo so it turned out looking really good. What could be improved is having sharper lines, adding more details, and just perfecting it more overall.

05
06
07

bottom of page